

Classifying Trapezoids Correctly
Do you teach quadrilateral classification? If so, did you know there are THREE ways to define a trapezoid?
Americans use either the inclusive or the exclusive definition depending on their curriculum. To complicate matters even more, teachers who live outside the United States define trapezoids in a completely different way! Believe it or not, the British English definition is the exact opposite of the two American definitions!
Which definition are you supposed to be teaching? If you're not sure, it's entirely possible that you're teaching the wrong definition! But don't feel bad if you discover this to be true because you are not alone. In fact, until recently, I didn't even know which definition was used by the Common Core State Standards!
Before we dig into this topic, you need to know which definition you're currently teaching. To find out, answer the trapezoid question below before you read the rest of this post. Then read the information under the 3 polygons that explains what your answer means.

What Your Answer Reveals
Because there are three ways to define a trapezoid, there are three correct answers to the question. Your response will reveal the definition you use to classify trapezoids.- If you only chose polygon 3, you use the exclusive definition which states that a trapezoid has EXACTLY one pair of parallel sides. This is the definition that I learned, and it's the one I thought the Common Core used (but I was wrong).
- If you chose polygons 1 AND 3, you use the inclusive definition which states a trapezoid has AT LEAST one pair of parallel sides. Many educators favor this definition because the other quadrilateral definitions are inclusive. For example, a parallelogram is a 4-sided figure with both pairs of opposite sides parallel, which means that squares and rectangles are also parallelograms.
- If you only chose polygon 2, you're using the British English classification system which states that a trapezoid is a quadrilateral with NO parallel sides. You teach your students that a quadrilateral with one pair of parallel sides is a trapezium, not a trapezoid.
Which definition SHOULD you be teaching?
Now you know which definition you use to classify trapezoids, but is that the definition you're supposed to be teaching? If you aren't 100% sure, make a note to check on it. Until recently, I thought the Common Core used the exclusive definition, but I discovered that the CCSS actually uses the inclusive definition! I posted a question on my Facebook page to find out which trapezoid definition most teachers were using, and over 180 people responded. I was surprised to learn that most teachers who follow the CCSS teach the inclusive definition.
 How to Teach Kids to Classify Tricky Trapezoids
If this is the first you've heard that there are three ways to define a trapezoid, you might be wondering how much to share with your students. I mean, quadrilateral classification is challenging enough to teach without having to explain that there are three different correct ways to define a trapezoid!
I recommend that you find out which trapezoid definition you are expected to teach, and only teach that ONE definition. You could tell your students that they might learn a slightly different definition at some point in the future, but if you go into too much detail, your students will end up more confused than ever.
After you know which definition you're supposed to be teaching, how do you introduce it to your students and help them learn to classify trapezoids correctly?
I've found that the best way to help your kids teaching those tricky trapezoids is with a simple sorting activity. There are two versions of this activity, and it's best to use both of them if possible. The first is a printable, hands-on activity for math partners which is great for guided practice. The other is a Google Slides activity you can assign in Google Classroom for additional practice or assessment. Both activities are included in the Sorting Tricky Trapezoids (or Trapeziums) freebie below. The directions in this post explain how to conduct the teacher-guided partner activity; directions for using the Google Slides version are included in the freebie.

Trapezoid (or Trapezium) Sorting Directions for Partners:
- Begin the activity by introducing the characteristics of a trapezoid (or trapezium) according to the definition you are expected to teach.
- Next, pair each student with a partner and give each pair one copy of the Quadrilaterals to Sort printable. Ask them to work together to cut out the polygons and stack them in a pile.
- Explain that they will take turns sorting the quadrilaterals into one of two categories using the T-chart. Give each pair a copy of the T-chart or have one person in each pair draw the T-chart on a dry erase board.
- Before guiding them through the sorting activity, assign the roles of Partner A and Partner B in each pair. Then ask Partner A to select the first quadrilateral and place it in the correct column on the T-chart. Partner A then explains the quadrilateral's placement to Partner B who gives a thumbs up if he or she agrees. If Partner B does not agree, the two students should discuss the proper placement of the quadrilateral and move it to the other column if needed.
- Partner B then chooses one of the remaining quadrilaterals, places it on the chart, and explains its placement to Partner A. Partner A must approve the placement, or the two students discuss the definition and placement before continuing.
- Students continue to switch roles throughout the activity. If they aren't able to agree on the placement of one of the quadrilaterals, they should set it aside for the time being.
- As students are working, walk around and observe them to see if they are classifying the trapezoids correctly. Stop to help students who are confused or who can't agree on the placement of one or more quadrilaterals.
Hands-on Activities for Classifying Quadrilaterals
This simple sorting activity is actually one of the most effective ways to teach kids to classify any type of quadrilateral. In fact, it's so effective that I developed a complete lesson for classifying quadrilaterals based on this strategy. Classify It! Exploring Quadrilaterals includes several introductory activities as well as a challenging game and two assessments.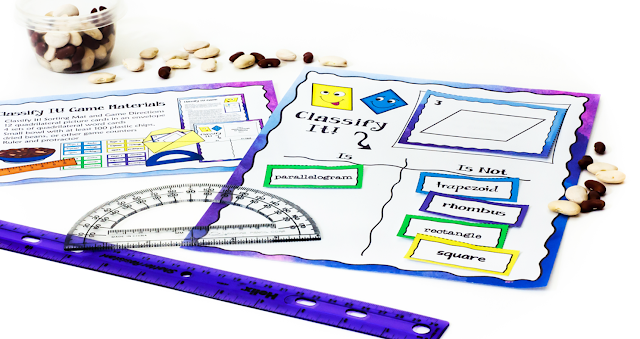
No matter which definition you're supposed to be teaching, Classify It! Exploring Quadrilaterals has you covered. You'll find lessons, printables, task cards, answer keys, and assessments that are aligned with the quadrilateral classification system used by your curriculum. Not only are these activities engaging and fun for kids, the lessons will help them nail those quadrilateral classifications every time! If you don't believe me, head over to see this product on TpT where you can read feedback from 400 teachers who have used Classify It! Exploring Quadrilaterals with their students.

If you teach quadrilaterals and haven't purchased it yet, take a few minutes to preview it on TpT. If you use it with your students, I think you'll agree that Classify It is the most effective and FUN way to foster a deep understanding of quadrilateral classification!


